Xargeon / ZhongDe Energy
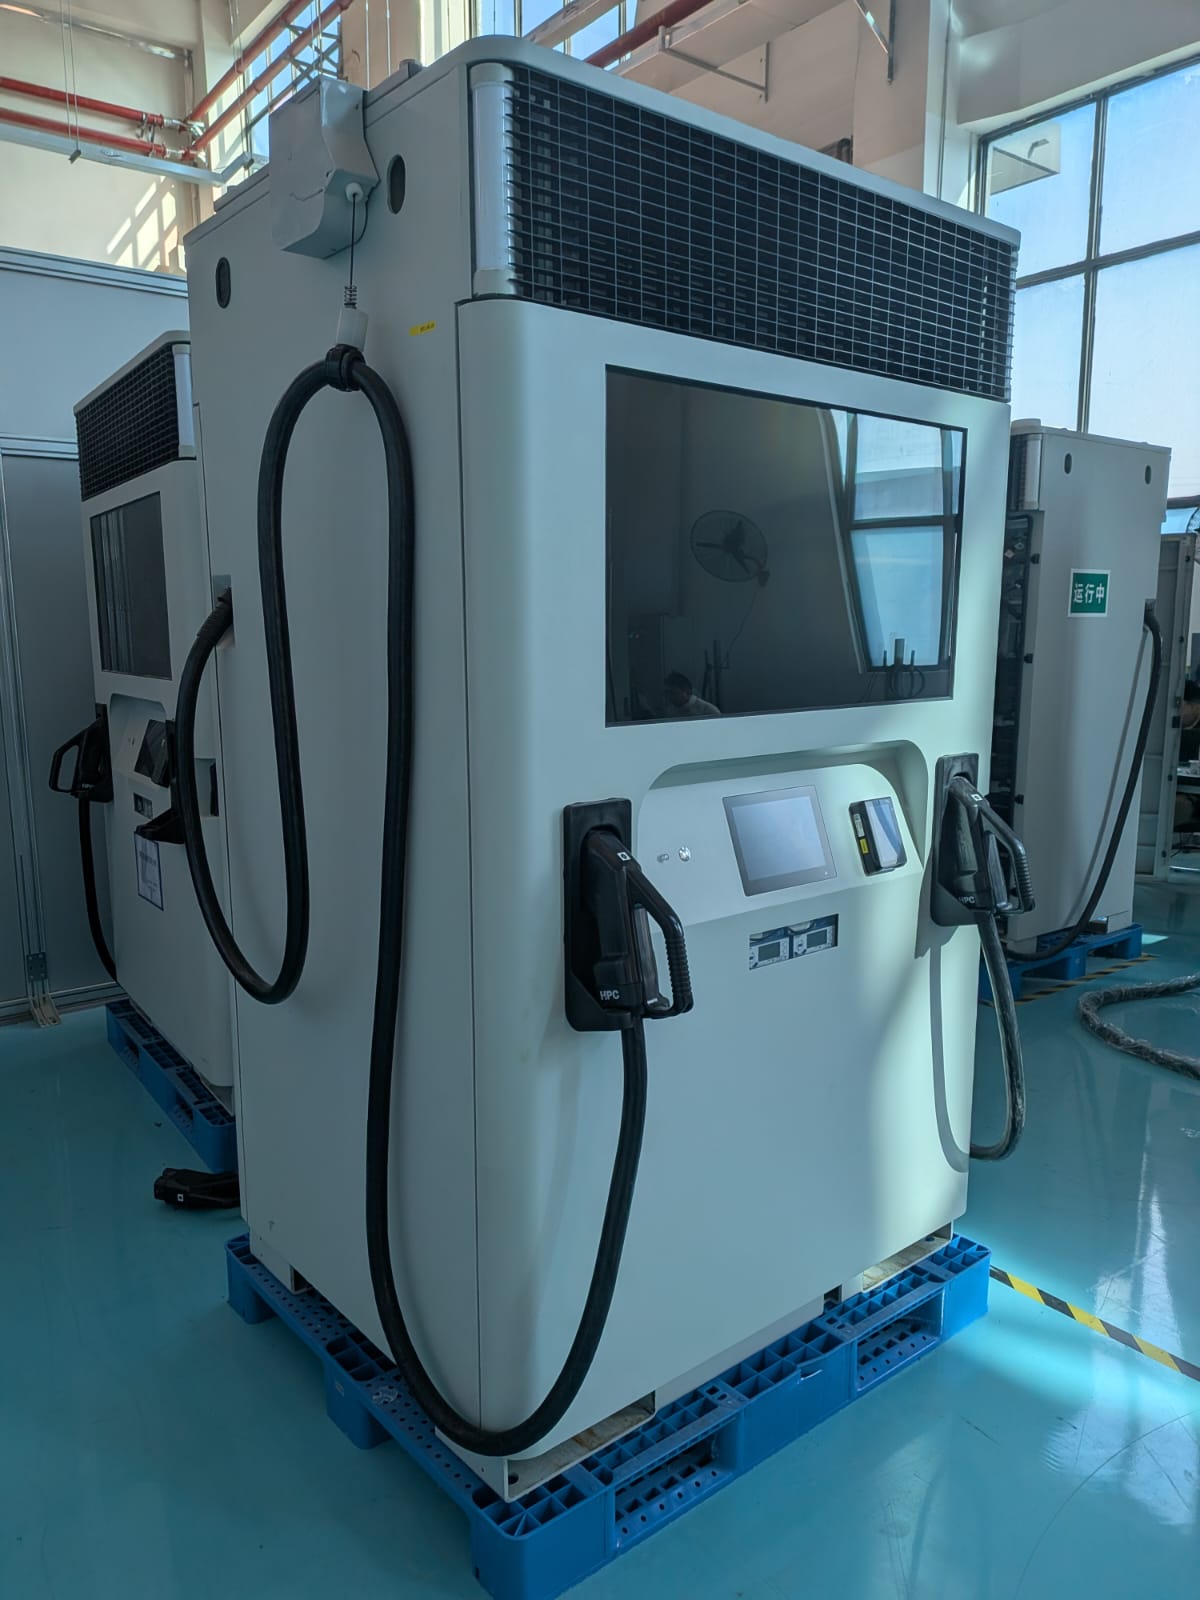
The SmartgridOne Controller supports two versions of the booster product line. The booster is a DC-fast charger with a built-in battery. Typically the battery is used to support the grid when charging an EV at high power, but it can be used for other purposes.
Supported Devices
| Device Type | Modbus TCP (Ethernet) | RS485 |
|---|---|---|
| Xargeon Booster generation 1 | ✅ | ❌ |
| Xargeon Booster generation 2 |
Setup
[!DANGER]
Safety warning: risk of electrocution
Disconnect power before performing the steps below. When the back panel is opened, it exposes a high voltage 800v DC bus.
Prerequisites: The system should be physically installed and connected to the power using the installation manual. The guide below only covers the installation if the communication with the network and with the SmartgridOne Controller.
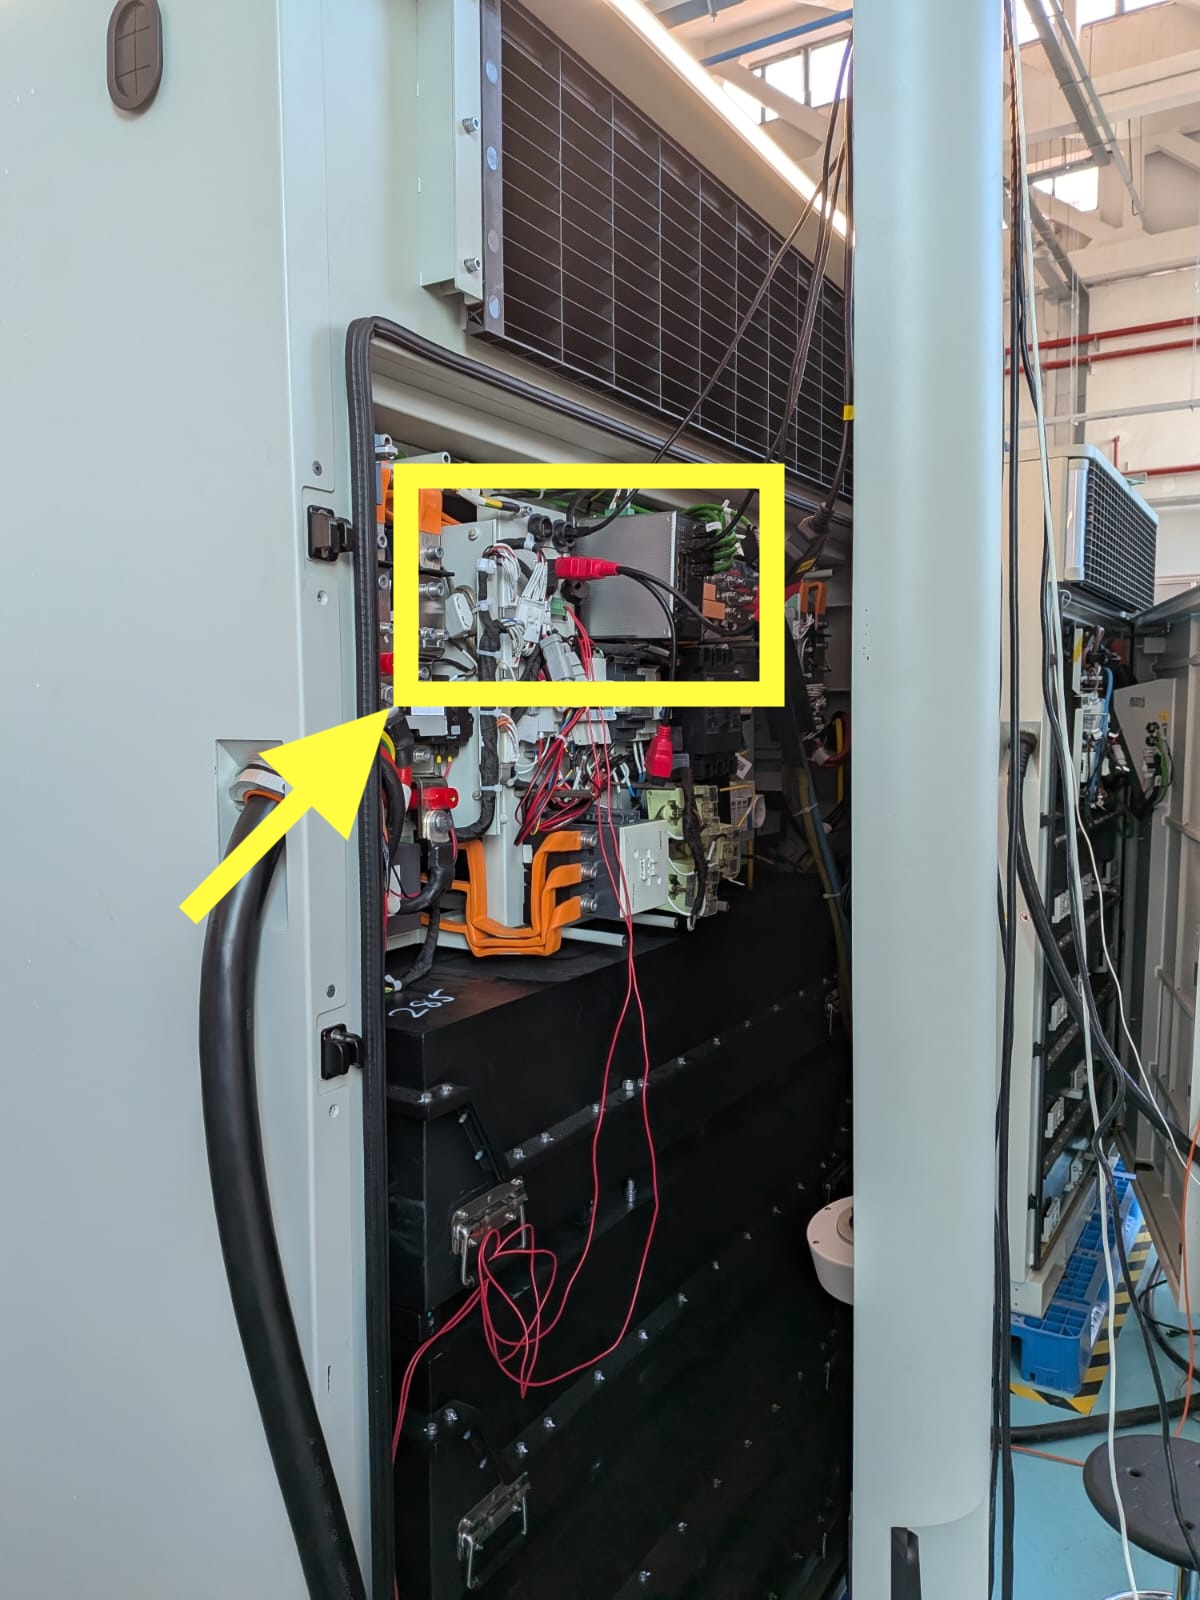
Step 1: The communication between the SmartgridOne Controller and the Xargeon Booster is established through Modbus TCP. Shutdown the power and open the back panel of the booster. Focus on the marked part in the picture:
Step 2: Use two ethernet cables to connect:
- Yellow: The interface for Modbus TCP. This cable can be connected to a network switch that is in the same subnet as the SmartgridOne Controller.a
- Orange: The interface for internet. This is, among other things, used for the payment interface.
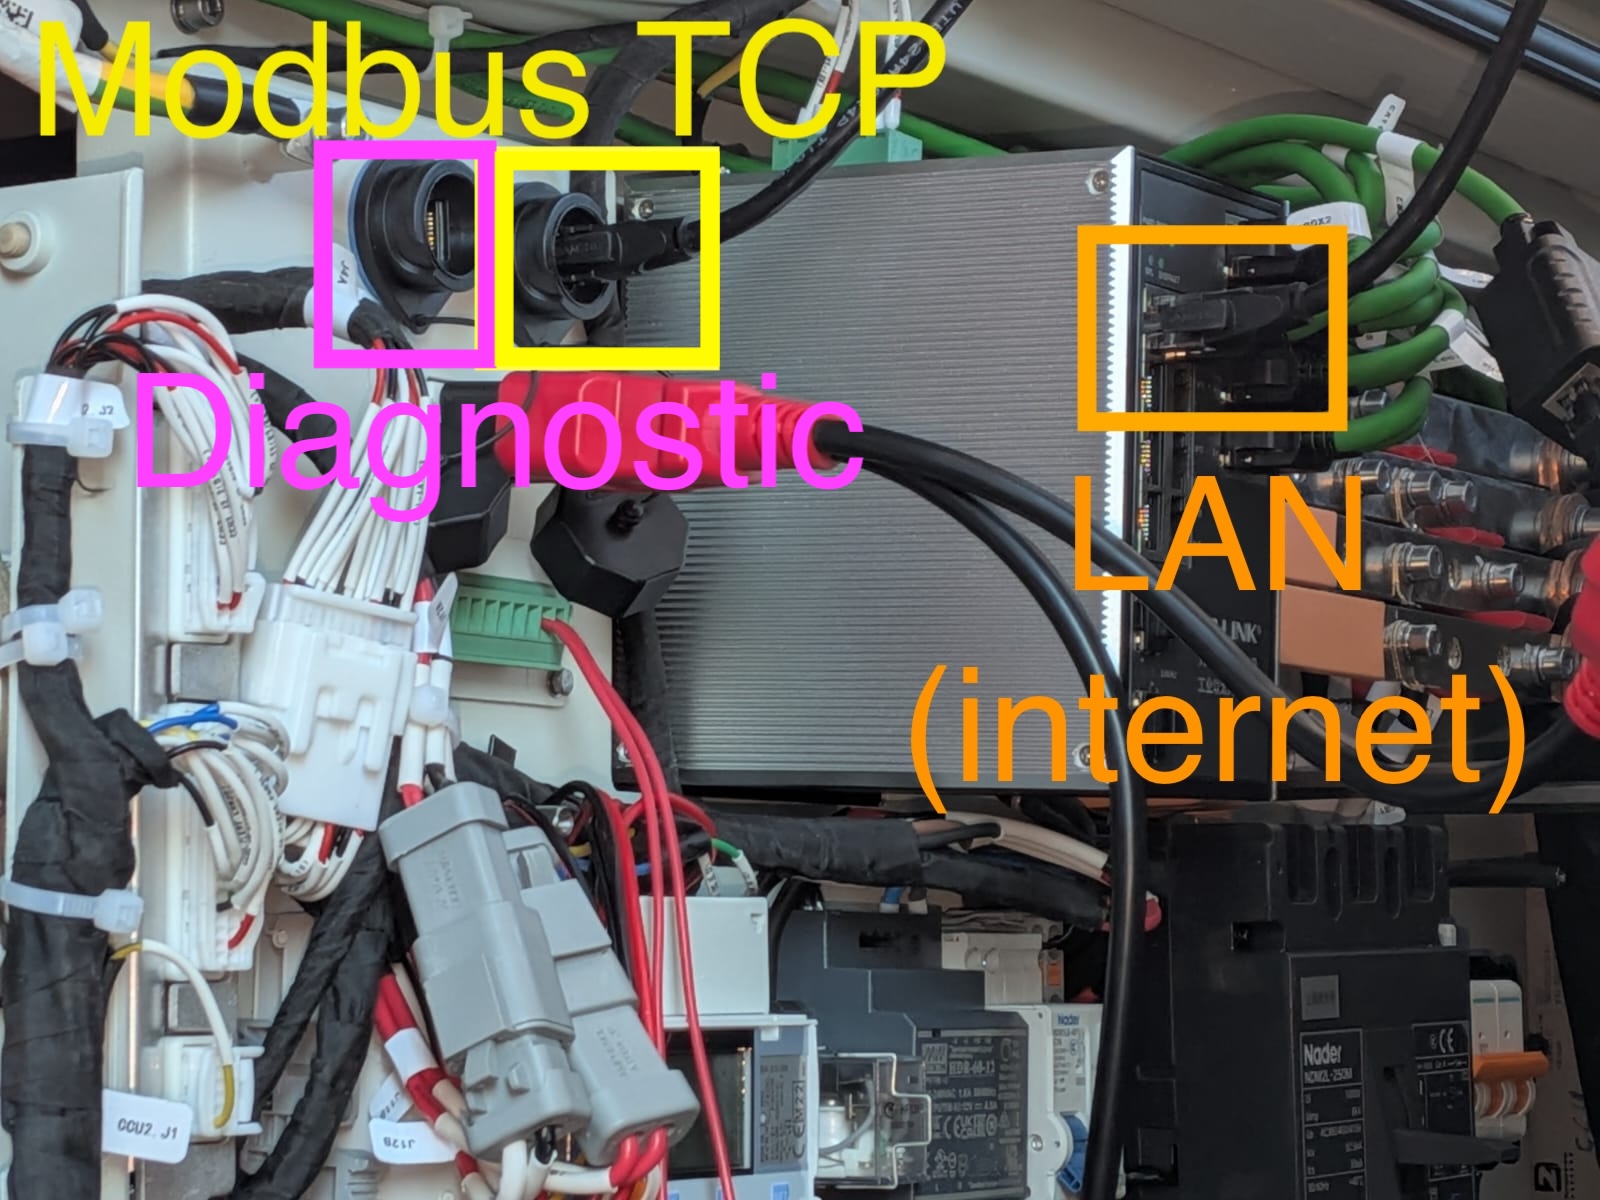
Step 3: Only for commissioning: Connect your computer with a LAN cable directly to the diagnostic interface of the Booster. This is the interface marked in purple in the image above. After commissioning, you do not need this interface anymore.
Step 4: Open the network settings on you computer, and manually assign IP address 192.168.1.101:
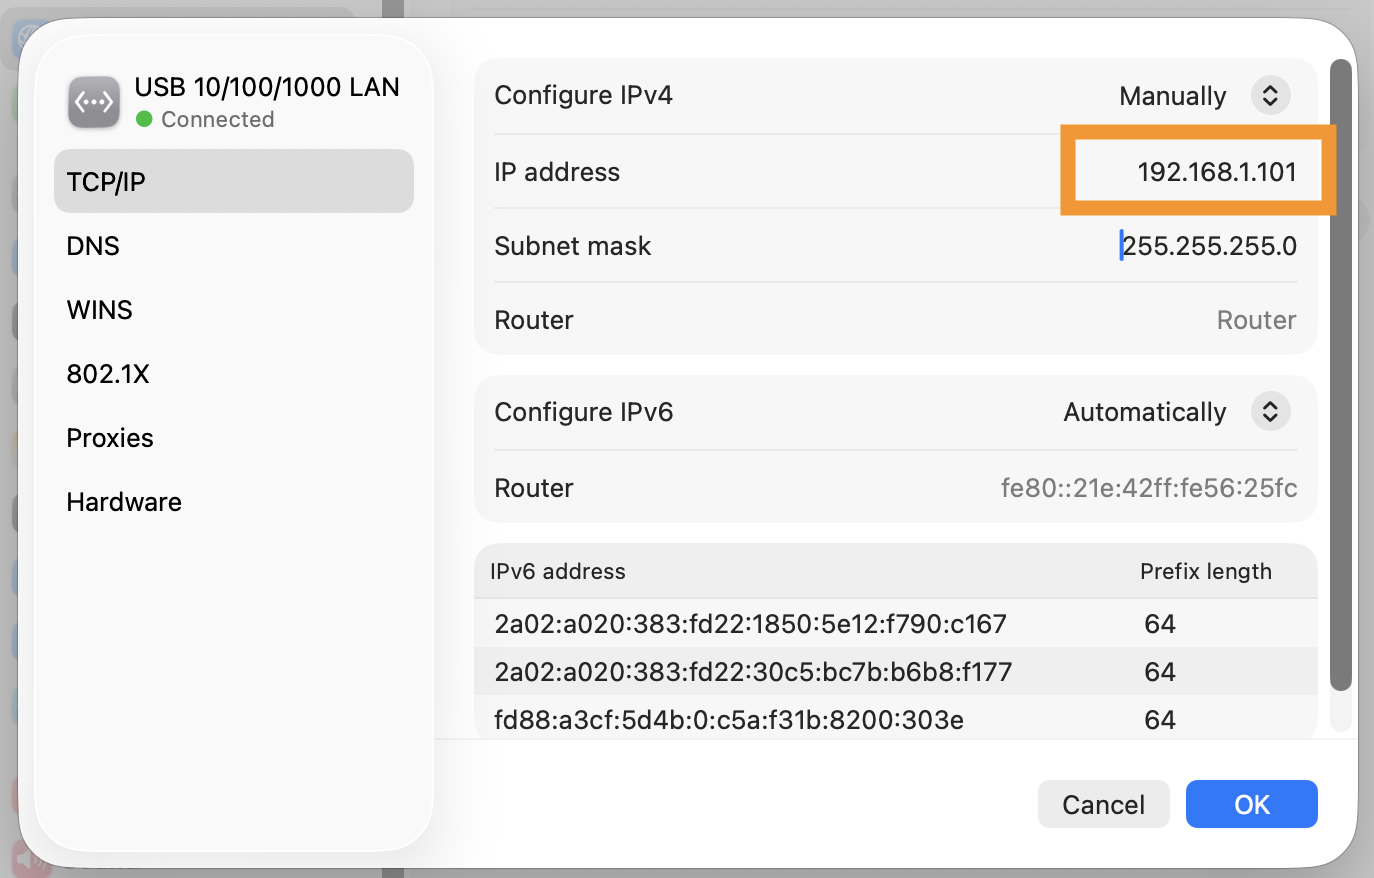
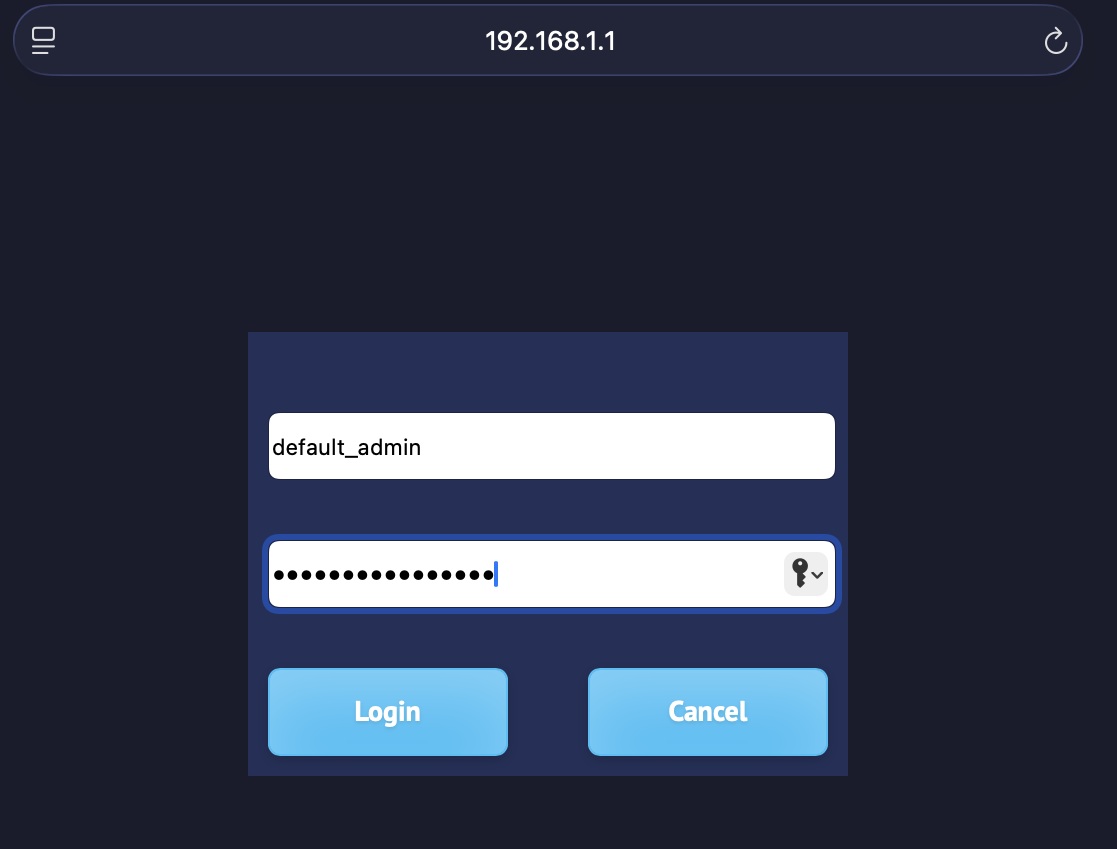
Step 5: Open the browser and go to https://192.168.1.1/. Proceed trough security dialogs if the browser warns about an insecure page.
The default username is default_admin and the default password is Default_Admin22! (pay attention to the capital letters).
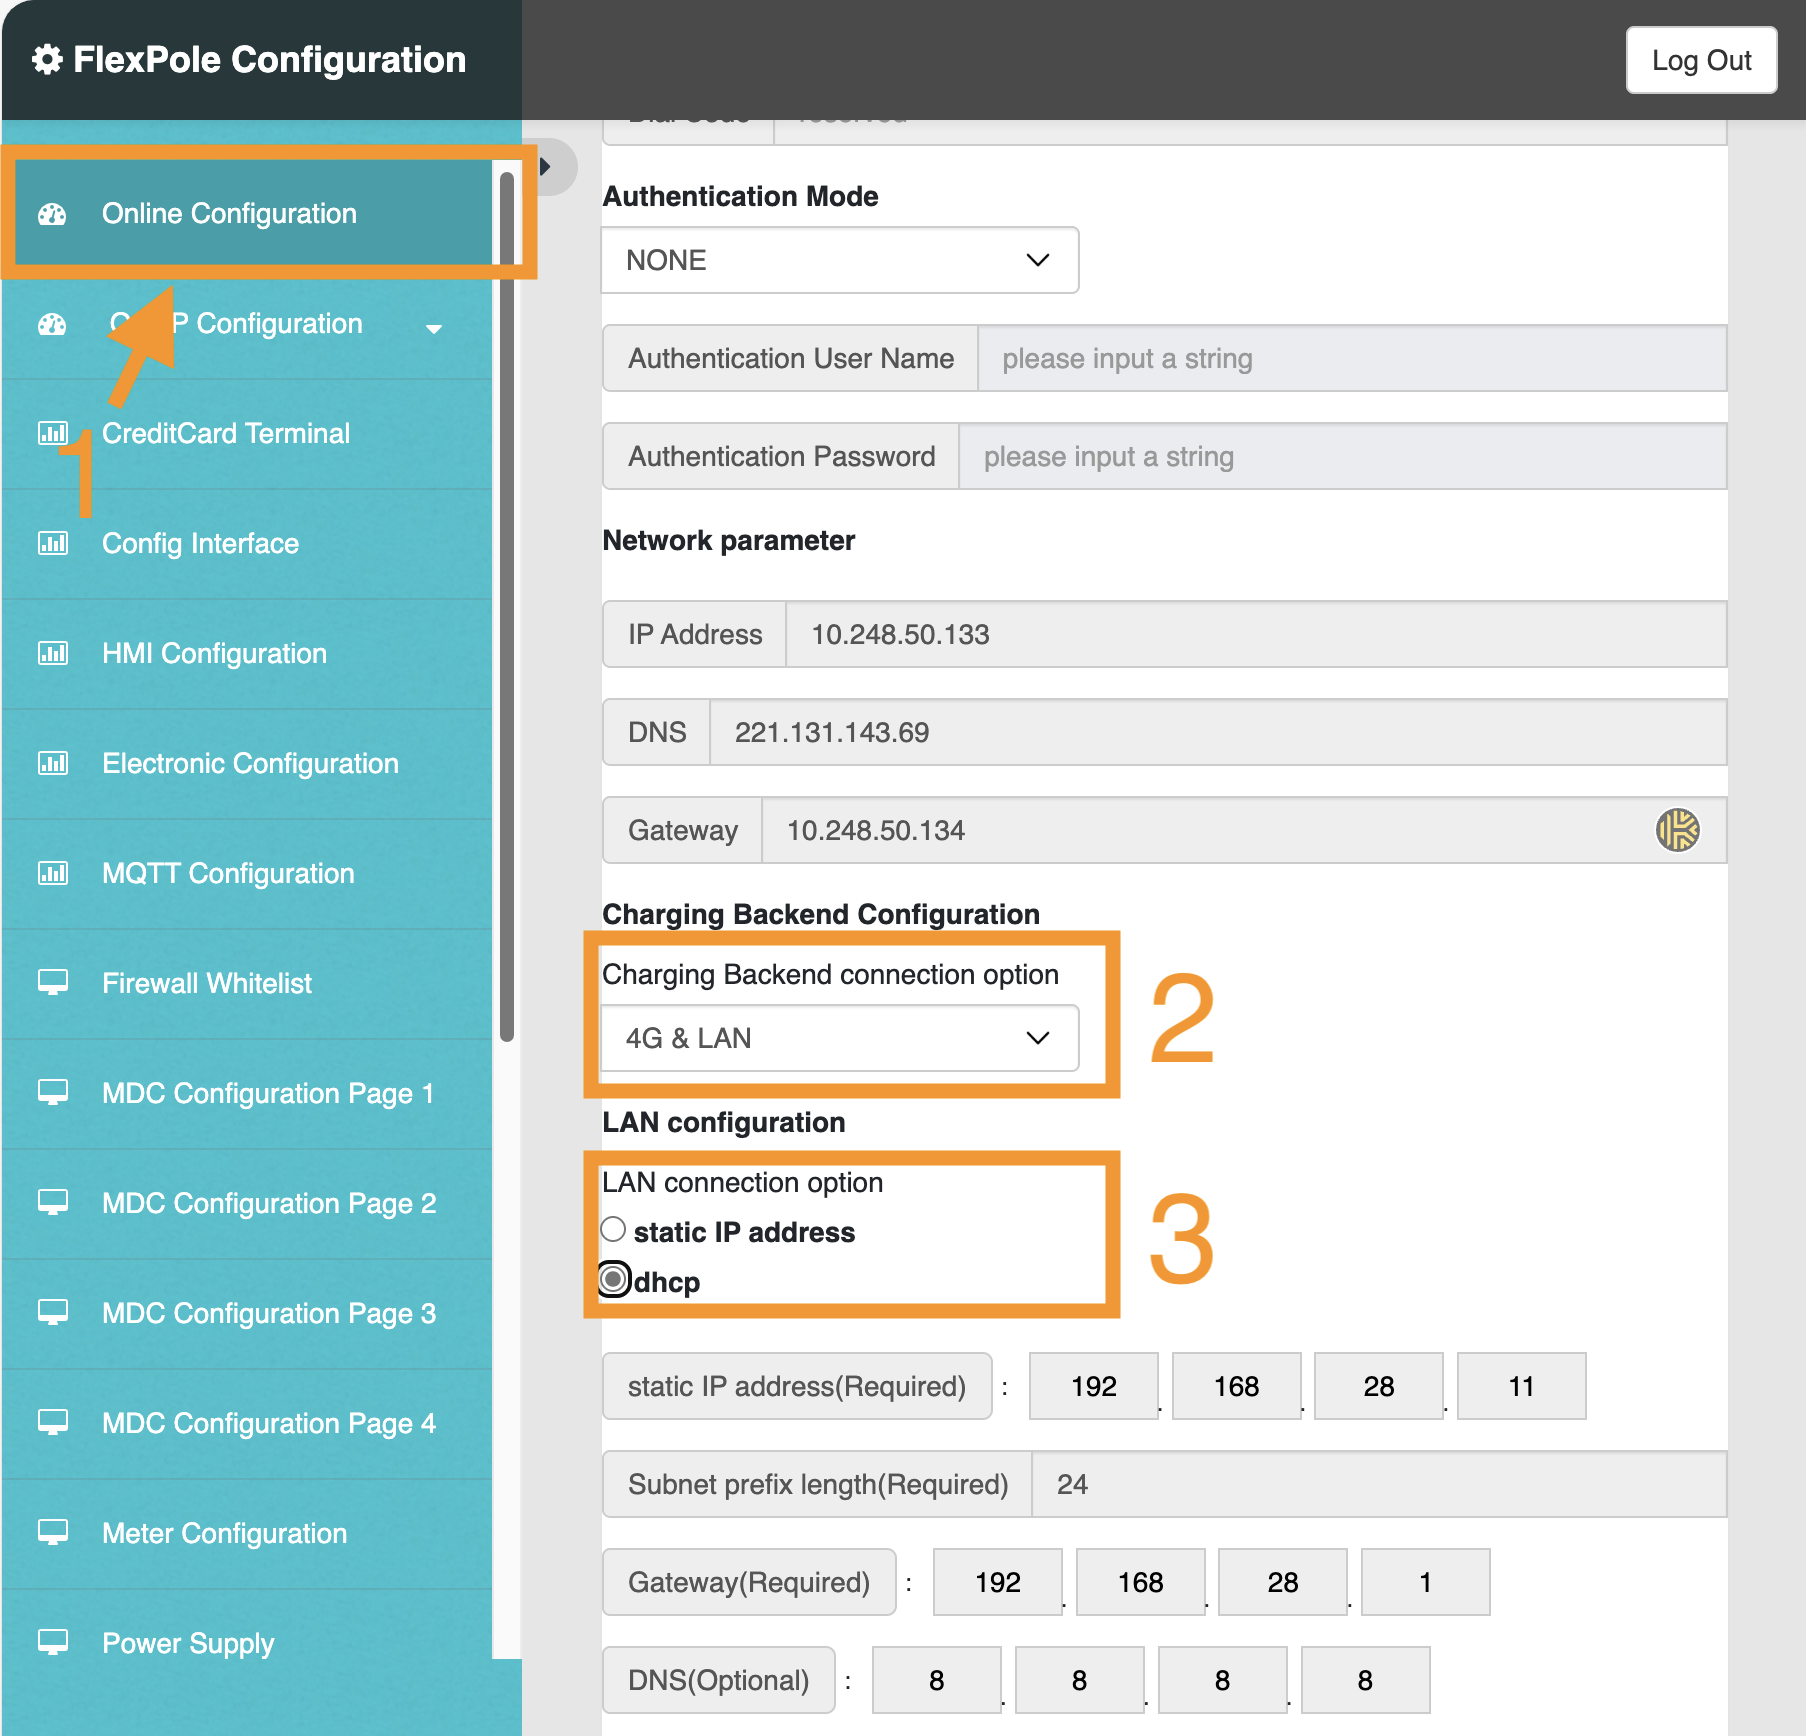
Step 6: In the sidebar, select 'Online configuration', and scroll down on the page. Adjust your settings to the marked areas in the image below:
Step 7: In this step, we need to upload a setting file to enable remote control.
IMPORTANT: This setting file must be provided by Xargeon. SmartgridOne, nor yourself can create this setting file as it the file is only accepted if it is electronically signed by Xargeon.

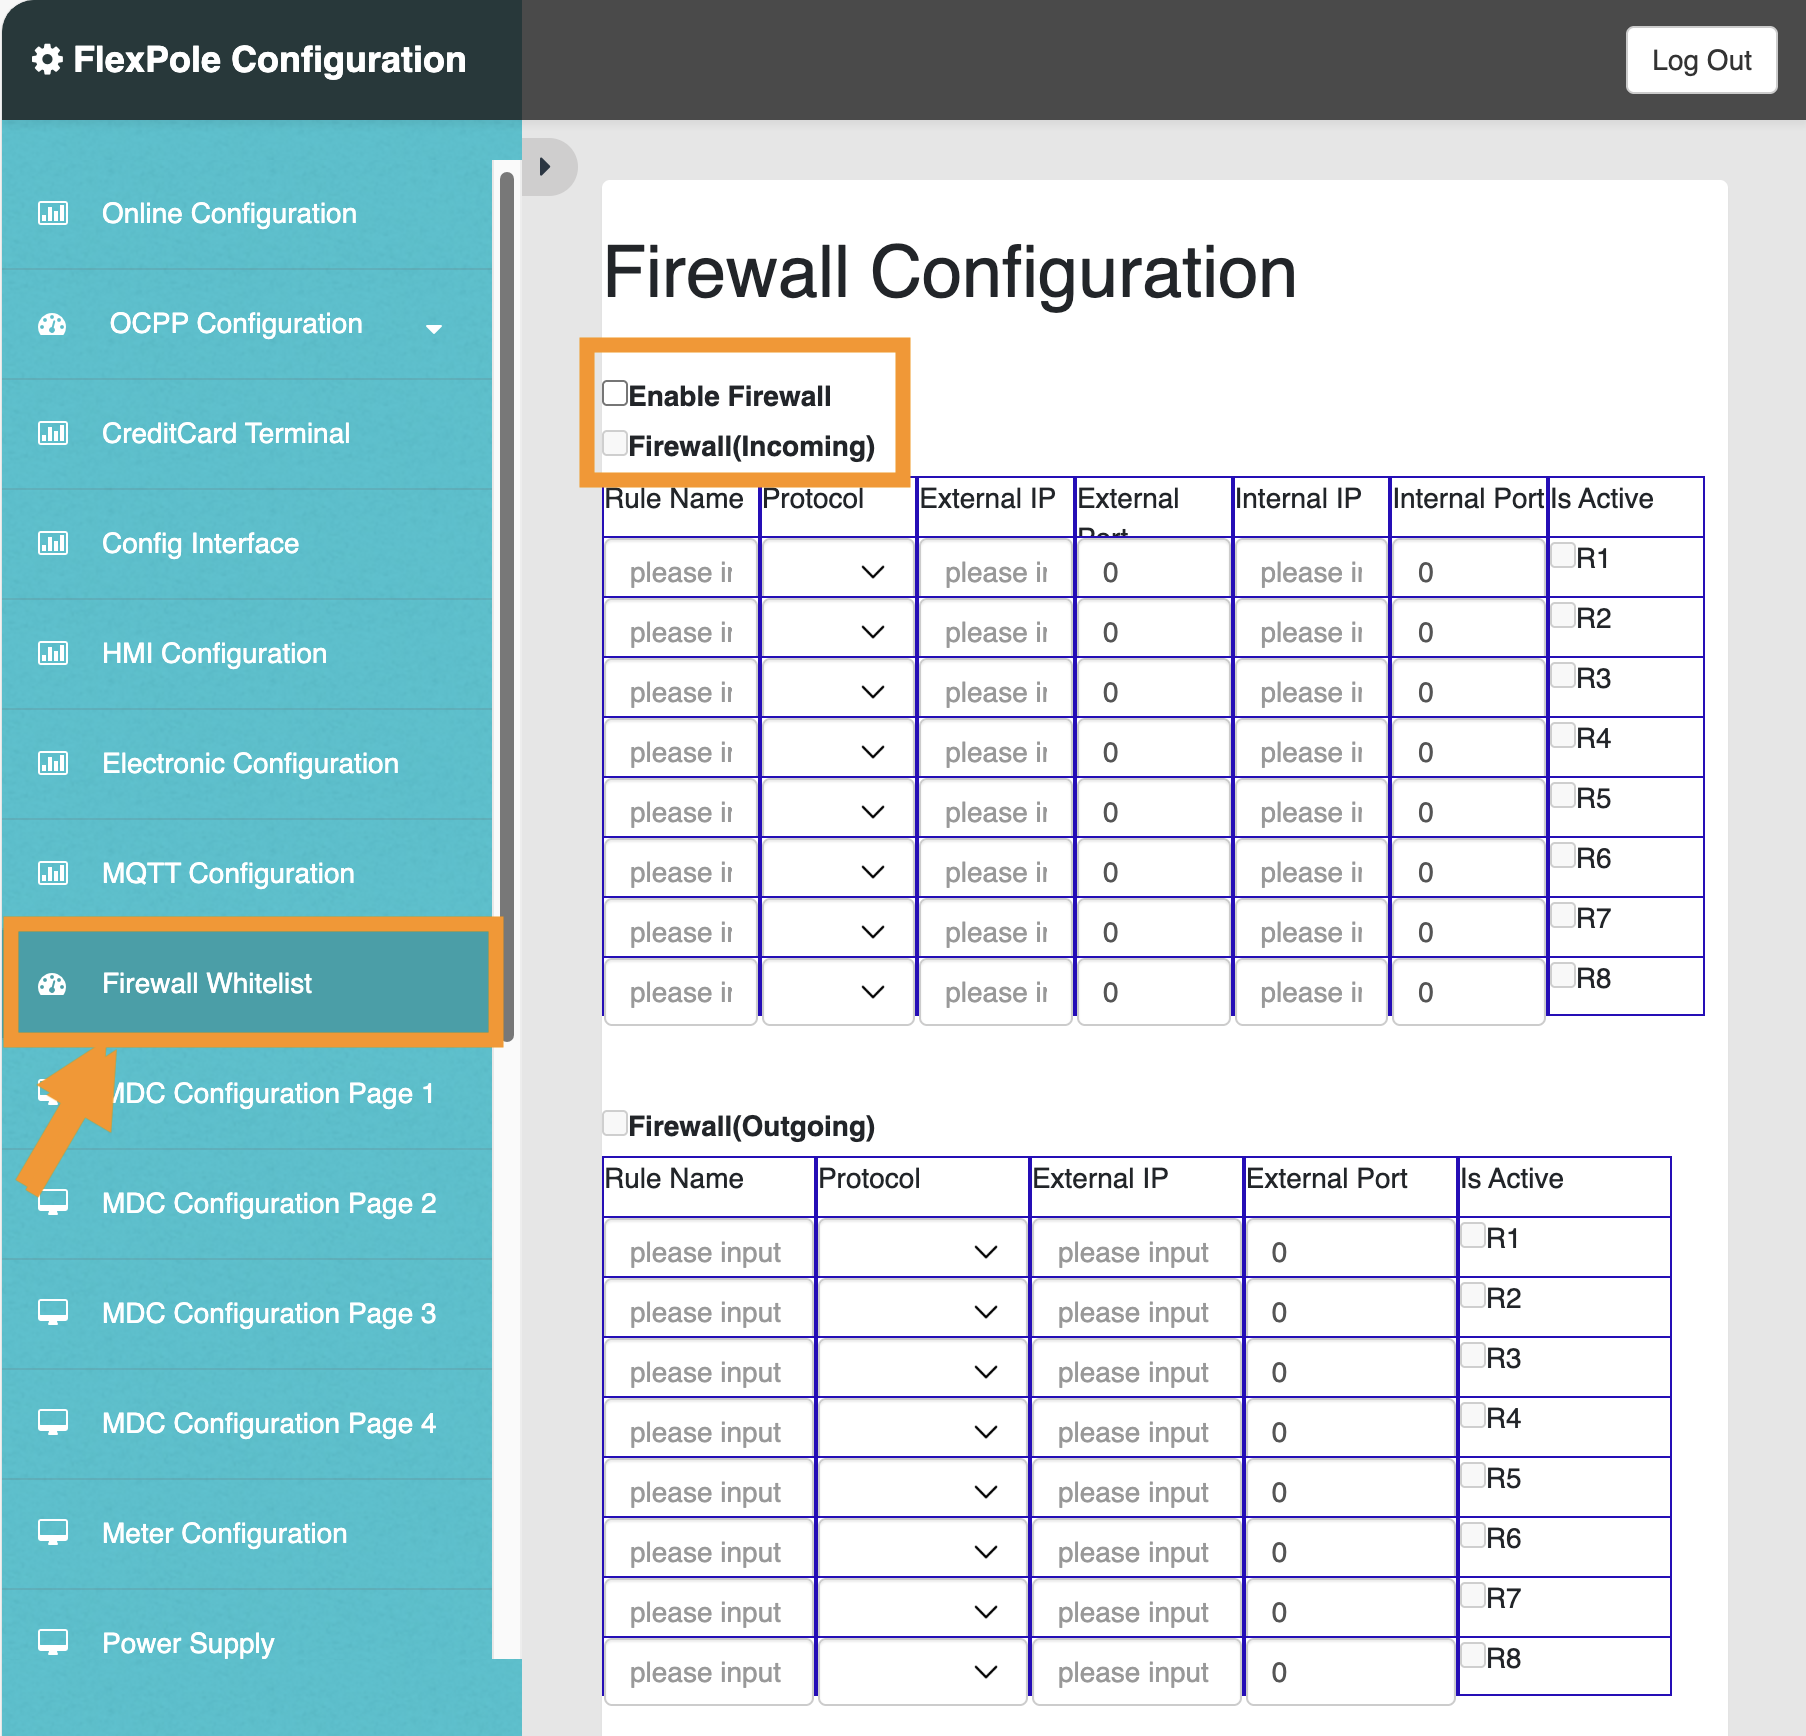
Step 8: Check the firewall settings. You have two options here:
- Disable the firewall entirely. This is the easiest option but should only be used in secure environments.
- Enable the firewall, and create a whitelist entry for the SmartgridOne Controller on port 502. You need to use the SmartgridOne Controller IP-address here.
Completed: The system is now prepared for a connection with the SmartgridOne Controller. Proceed in the SmartgridOne Controller interface find the device in the wizard.
Settings
Technical notes
Booster generation 2
Control modes
The Booster generation 2 has the following characteristics:
- 80 kW AC/DC converter
- EV connector 1: 200 kW DC
- EV connector 2: 210 kW DC
- Battery 218 kWh energy capacity; 240 kW power capacity
This means that the battery can only be (dis)charged with 80 kW from and to the grid. The discharge power is up to 200 kW when discharged to DC meant for EV charging. Depending on the battery control power, we switch between two modes that are provided by Xargeon:
- Recharge mode: This is activated when the battery is charged from the AC side or when the battery setpoint is 0. When this is active, the EV charging power is limited to 200 for EV connector 1 and 210 kW DC for EV connector 2 (combined up to 240 kW)
- Feed in mode: This is activated when the battery is discharged to the AC side. When this is active, the EV charging power is limited to 130 for EV connector 1 and 140 kW DC for EV connector 2 (combined up to 160 kW).
Minimum state of charge
By default, the minimum state of charge is set to 10%. When it discharges to this level, it should be charged up to 20% before discharging again.