Network Troubleshooting
How to get a connection to your controller after a static IP was set.
Situation: You changed the network configuration on the controller and can’t connect to it or detect it in the network.
Goal: Reconnect the controller to the network.
Physical topology:
Connect a CAT5 or CAT6 cable with RJ45 connectors between the Network Interface Card (NIC) of the Controller and the laptop / computer.
On both ends the LEDS be on. Depending on your NIC, you have 1 or 2 LEDs.
Configuration:
Change the network configuration of your ethernet port on your laptop / computer to the network settings that corresponds with the current network configuration of the controller.
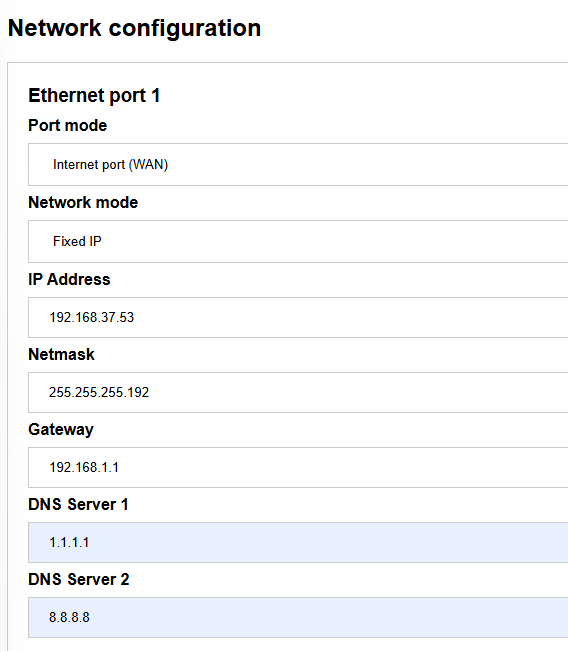
For example the network configuration on the controller has been set to
IP 192.168.37.53
Subnet Mask 255.255.192.0
Gateway 192.168.37.1
With this information, you may set the network configuration on your computer to e.g.:
IP 192.168.37.20
Subnet mask 255.255.192.0
The Gateway may be left blank, as their’s no gateway in this topology of the direct connection.
You may change these settings from the Network Settings on your devices. For example in Windows 11 this flow may be used:
- Open the settings and o to Network & internet
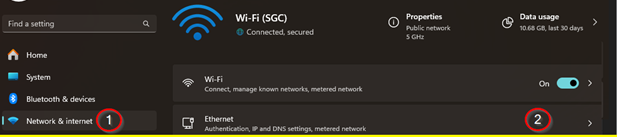
- Click on “Edit”, change the IP address setting to Manuel and turn on the IPv4 setting.

With these changes, you should be able to reach the address of the controller from your browser.
- We need an Ethernet cable that is connected to the controller and not to a switch or to a router.
- The controller was set to a fixed IP earlier, such as the following:
- The controller should be connected directly to the ethernet of the computer. To be certain of the state, I did a factory reset on the controller from the button.
- The adapter's address should be changed to one that is within the subnet of the address and the netmask we have. (As in this case of my test, 192.168.37.53 255.255.255.192)
- The subnet mask decides the range of your address. We can see the possible subnets from here for example (https://www.calculator.net/ip-subnet-calculator.html) Since we have an address on the first of the possible subnets in this example , we can set our address to any other within the .1-.62 range.
This can also be seen on the following table /26 -- 4 Subnets -- 62 Hosts/Subnet
| Network # | IP Range | Broadcast |
|---|---|---|
| .0 | .1-.62 | .63 |
| .64 | .65-.126 | .127 |
| .128 | .129-.190 | .191 |
| .192 | .193-.254 | .255 |
-
(Taken from https://www.aelius.com/njh/subnet_sheet.html )
-
Then, on my browser I opened the fixed IP of the controller, which I had set before starting the test in step 2.
-
You should be now able to reach the control panel of the local page.
The login details will be visible on the screen, as the controller is not connected to the cloud at the moment, your insights credentials might not work.
-
Once you login, if you have a screen for the configuration of the controller, you can click on the skip button as we will perform a full factory reset.
-
The next step is to go to Settings, and then click on the Factory reset and proceed.
-
Once the controller has finished the restarting process and the light is no longer blue, you can disconnect the cable from the computer and connect it back to the network (e.g. directly to the router).
-
You should be able to connect now directly from the Toolbox and the VPN webpage and the LED light shall be green.
Dont forget to change the network settings back to dhcp or automatic IP address.