Autarco OX系列 RS485 接线

本页面描述了与Autarco OX系列并网逆变器通过Modbus-RTU(rs485)进行通信的方式。 默认情况下,逆变器设置为地址1。
OX逆变器具有以下通信端口:
- COM1:绿颜色4针连接器用于WiFi/蜂窝数据记录仪。
- COM2和COM3:电缆密封件和后面的连接点的盖子:
- 2个RJ45连接
- 1个RS485接线端子块
对于SmartgridOne Controller,RS485通信通过"COM2接线端子块"端口进行。该端口在下图的橙色框中标记:
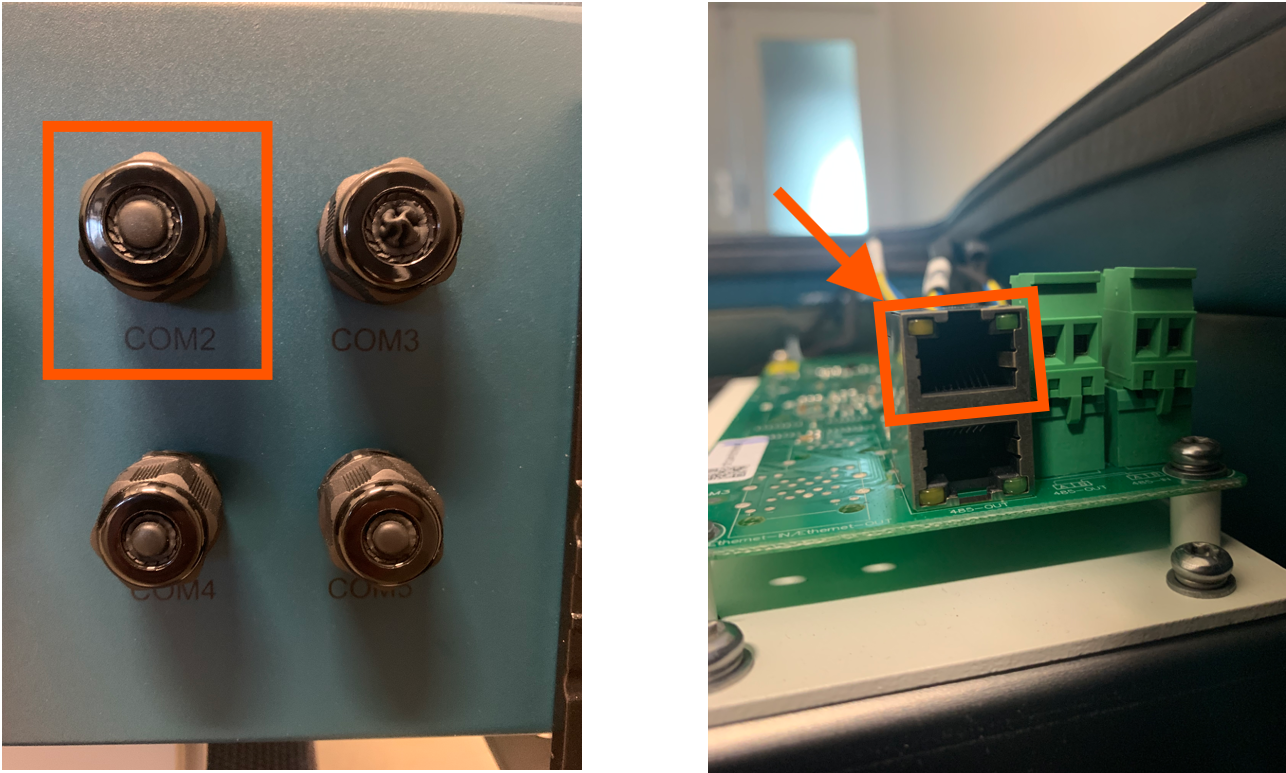
该端口为RJ45端口,用于RS485通信。 需要准备一根电缆将逆变器连接到逆变器。
- 将电缆插入RJ45连接器,然后用压接工具将连接器压接。
- 从逆变器底部标记为COM2和COM3的防水电缆密封件上拆下盖螺母。 从接头中拆下插头。
- 将RJ45连接器插入逆变器维护室中的RJ45端口。
- 更换COM2/3的盖螺母并紧固。
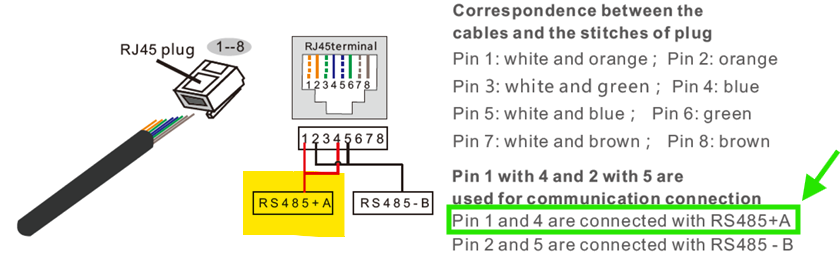
RS485 Wiring
- For correct RS485 wiring: Follow the guidelines for RS485 wiring.
- If the wiring shown in the table below is incorrect, please let us know.
- There is no general consensus in the industry about the usage of A and B for the RS485 polarity, so it may be counterintuitive and opposite of what you might expect for some devices.
| Device | SmartgridOne Controller model OM1 | SmartgridOne Controller model IG8 | RS485-USB converter | RS485-Ethernet converter |
|---|---|---|---|---|
| Pin 3 | RS485 A | RS485_POS | RS485 A | TX+ |
| Pin 4 | RS485 B | RS485_NEG | RS485 B | TX- |
| N/A | RS GND | GND | Not available | G |
NOTE: RS485 Device Addresses
- You MUST give each device on the RS485 bus a unique address. Check the manual of the device on how to do this.
- Use lower addresses first (1, 2, ...) because the SmartgridOne Controller will find them faster!
- For each device, it is generally recommended to stick with the factory default baud rate, parity, and stop bits. The SmartgridOne Controller will scan on those first.